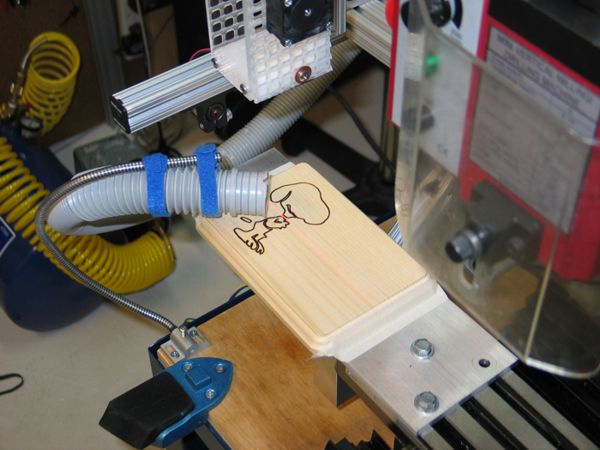
 I was thinking about buying a laser engraver/cutter for home, but after retrofitting for CNC the Micro-Mark mini mill that my wife gave me for my birthday, I figured that I could simply add a CO2 laser to the X2 mini mill.
Before describing the mod, I figured you would want to see some results. Here is a YouTube video of my X2 mini-mill laser engraver in action:
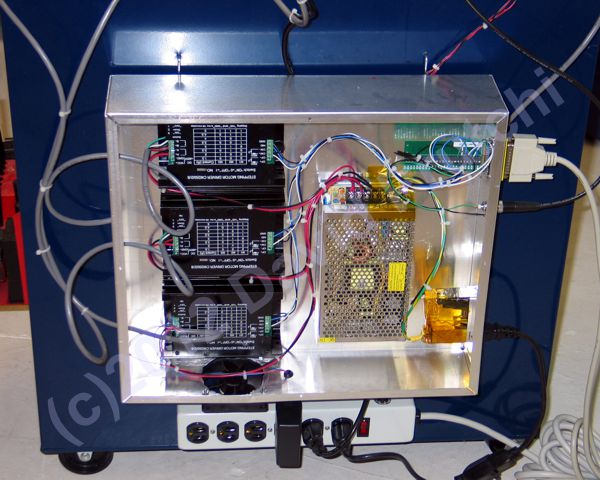
My mechanical platform consists of the Mini-Mark version of the Sieg X2 mini mill that I retrofitted for CNC using the kit by CNC Fusion. I use three 57BYGH405A 21.0 kg-cm (277 oz-in) 6-wire NEMA 23 stepping motors. The steppers are driven by three CW250/2/8 stepper controller modules. Power for the CNC system is derived from a HF-240W-5F-30 240W 30V/8.0A power supply.
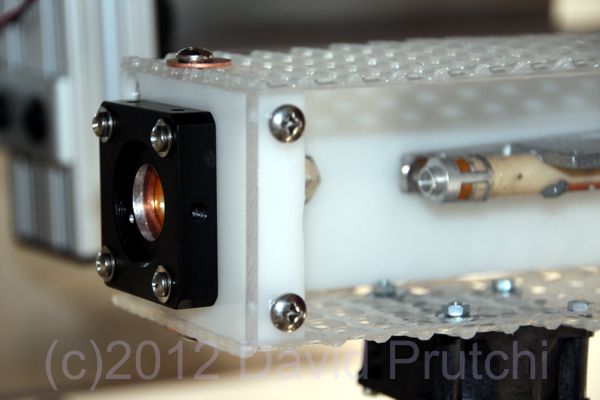
I built the laser head from a surplus 18 W sealed-tube, RF-excited laser tube originally used in a Domino Laser coder. I shied away from trying to use a DC-excited Chinese-made CO2 laser tube because of the need for deionized water cooling and high-voltage wiring. Instead, I chose a surplus RF-excited CO2 laser tube with its matching power supply. Tubes made by Synrad/Laakman for Domino Laser have been showing up on eBay. A surplus tested tube with its matching RF power supply sells for around $600. These tubes are very compact, only need air cooling, and lase when fed 100 W of RF at 27 MHz through a single coax cable. The tube made by Synrad is similar to the one used in one of their series-48 air-cooled laser heads.

I made the base and ends of the head out of 1/2″ Delrin. The top is 1/4″ Plexyglass, and the sides are made of thick nylon mesh to provide sufficient ventilation. Four 12 V fans are mounted on the mesh to help cool the laser tube. I decided not to build the enclosure out of metal because it detunes the RF tank used for excitation.

I milled the exit end perfectly flat to ensure that the base and end piece form a perfect 90 degree angle. I then matched a Thorlabs model CP-02 SM1-threaded 30 mm Cage Plate to hold a surplus 1″ diameter ZnS focusing lens. By the way, I used a 6″ focal-length lens in the YouTube video above so that it would clearly show operation, but I usually use a 1.5″ focal-length lens for precision engraving and cutting.
I mounted the laser head onto a 1″ x 1″ aluminum profile by 80/20 (purchased at McMaster-Carr), and constructed a rigid stand from 2″ x 1″ profile. I linked the two using 80/20 components in such a way that I can easily move the head up/down to focus the beam.
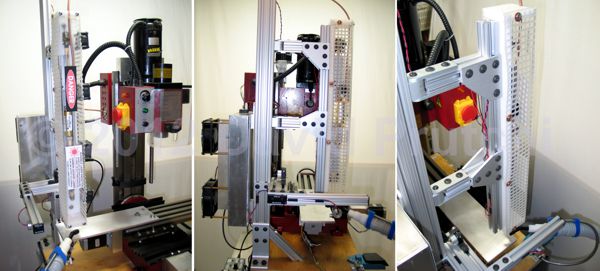
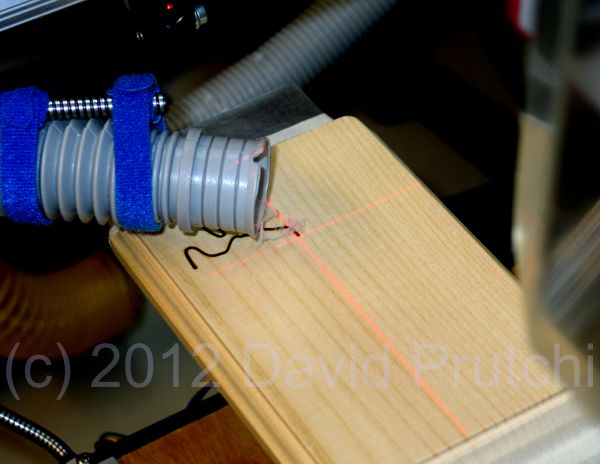
I mounted two laser-line generators (red diode laser modules that project a line instead of a dot) on the stand so that a cross-hair is projected on the workpiece where the invisible CO2 laser is focused.
The RF exciter for the laser tube is a surplus unit, also widely available on eBay, built by Synrad as an OEM component for Domino. Driving characteristics for the exciter are very similar to the ones shown in this Synrad 48series_manual.
The RF power supply produces around 100 W of RF at the authorized ISM frequency in the 27 MHz band. So, the electrical input of 300 W is turned into 100 W of RF, which excites the laser tube to yield around 15 W of optical output in the infrared region. This conversion efficiency is thus around 5%, the rest of the input energy is lost as heat.
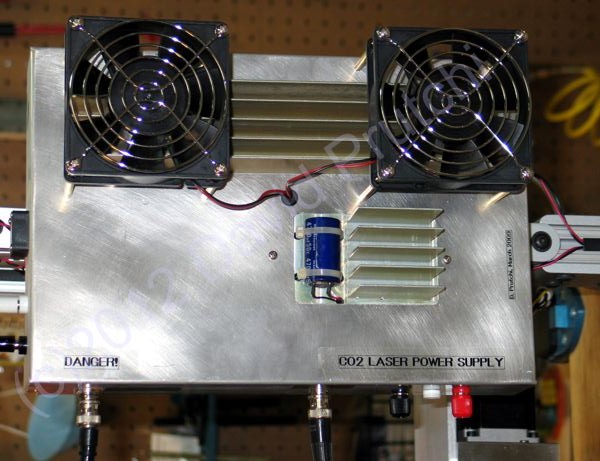
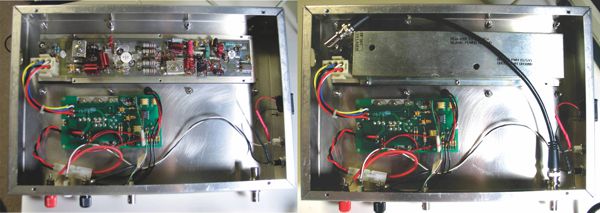
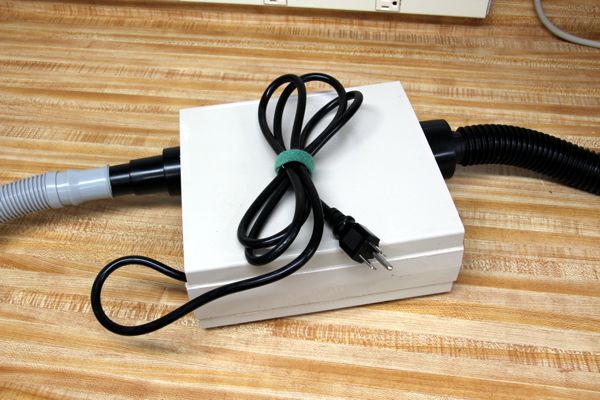
At some point during testing, while running the laser at 100% power, I heard something go “clunk!” inside the power supply and the laser stopped working. I found out that I had no RF output from the power supply, although it was still pulling 9 A from the 30 VDC input. Upon opening the RF module, two large inductors and a variable capacitor fell off. They had unsoldered themselves from the PCB (they were part of the power amplifier’s output network)! Well, I had wrongly assumed that the large heat dissipator fins on the RF module would suffice to cool it. As such, I had to rework the power supply to add two large fans to force air flow through the fins, as well as a small fan to circulate air within the power supply enclosure:
The piece to be laser-cut/engraved is mounted on top of a platform that extends over the x-axis stepper motor in the Sieg X2 mini-mill. This platform is simply an aluminum plate that bolts on the X2’s table. I usually tape or clamp the piece to this extension when marking. For cutting (e.g 1/4″ acrylic), I place a honeycomb between the aluminum plate and the sheet being cut.

This completes the main hardware hack to add laser cutting/engraving capabilities to a CNC-retrofitted Sieg X2 mini mill. Mine looks like this:
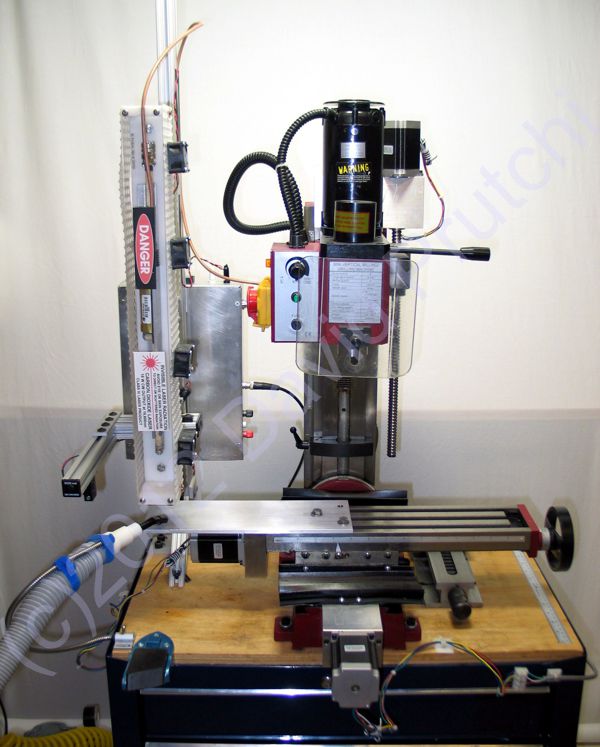
The spout and grey hose that is held by gooseneck tubing on the left of the table is to vacuum fumes produced by the laser during wood burning, engraving and acrylic cutting. It is a MUST if you operate the system in an enclosed space. I connect the grey hose to a d.i.y. fume extractor that I built from a large impeller fan. The output hose vents to the outside.
The CNC software that I use is Mach3 by ArtSoft. In my opinion, this is the best software for controlling d.i.y. CNC machines. It is incredibly inexpensive, yet powerful enough to tackle most any CNC job with the tools available to advanced amateurs.
The following is a pdf printout of the Mach3 XML configuration file that I use for vector engraving/cutting with my laser: X2Laser To use the X2Laser.xml file, create a shortcut with the following properties: C:\Mach3\Mach3.exe /p X2Laser.
Besides vector cutting/engraving, Mach3 is able to control raster-scan engraving. I have been experimenting with laser-engraving photographs on wood. I still have some pesky bug that leaves the laser on after the last point (Abi doesn’t have a wire sticking out of her nose), but I’ll figure it out…
(UPDATE 2/8/2012: “Tweaky” Cooperman, the author of the engraving dll for Mach3 corrected this bug in his latest version released at: http://www.cooperman.talktalk.net/Engraving.dll. In addition, there are undocumented M11 / M10 commands which can be used to switch the laser on/off co-incident with axis movement and thus without delay. These have been been fixed by Brian at Artsoft and the latest version R3.043.056 now incorporates the changes: http://hobbycncart.com/publ/cikkek/mach3_temaju_cikkek/switching_a_laser_under_mach_control/8-1-0-29)
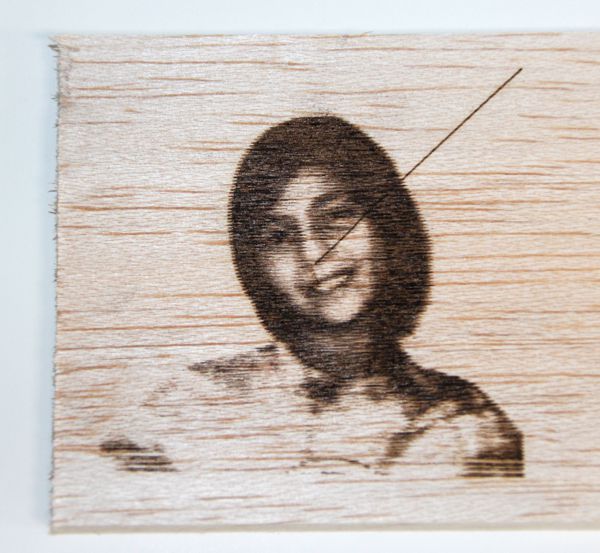
For raster graphics with Mach3, the laser’s PWM control pulse must be stretched to turn-on the laser whenever Mach3 wants to print a dot. I designed and built the following 555-based circuit for this application: Pulse Stretcher for Domino Laser schematic. The width of the pulse controls the contrast that you will obtain when engraving. The picture above was engraved in balsa wood with a pulse width of around 10 microseconds.

The following is a printout of the Mach3 XML configuration file that I use for raster scanning: X2LaserScan To use the X2LaserScan.xml file, create a shortcut with the following properties: C:\Mach3\Mach3.exe /p X2LaserScan.

Nice work!! … Lasers are a bit out of my league these days but kudos to you.
What did you use to label the C02 Power Supply cabinet with?
They appear to be clear adhesive plastic with black text, but where did you get them or how did you make them?
Hi Andy,
Thank you for your kind comments.
The labels are simply inkjet-printed heavy glossy photo-quality stock. After cutting them to size I gave them a coat of Acrylon. Then glued them in place with a very thin layer of RTV.
Cheers,
David
I would strongly suggest that you add information about what kind of safety features you use or have installed, since lasers can be mighty dangerous. Laser safety glasses are a must, and fire extinguisher should be handy, too. A safety stop to turn off the beam easily is also a really good idea.
Thank you very much Lenore. I completely agree with you. Lasers, especially Class IV lasers, are very dangerous and should not be treated casually. I added a warning to the post, which I encourage fellow makers to take very seriously. Thank you very much for pointing this out.
Cheers,
David
Hi David,
The final line on your image of abi was a problem with the Mach plugin. I have now made a few changes and my latest version can be downloaded from here http://www.cooperman.talktalk.net/Engraving.dll
You may also be interested that the undocumented M11 / M10 commands (which can switch the laser on/off co-incident with axis movement and thus without delay) have now been fixed by Brian and the latest version R3.043.056 now incorporates the changes. There are more details here http://hobbycncart.com/publ/cikkek/mach3_temaju_cikkek/switching_a_laser_under_mach_control/8-1-0-29
Great website you have, keep up the good work.
Best regards,
Tweakie.
Thank you very much Tweakie! I updated the post and will try the new dll tonight. Cheers, David
Hi David,
Due to the relatively low G01 speed of your Seig X axis and the need to extend the pulse width output from the Mach3 plugin, you may also like to try the new Hungarian program DotG.
This produces GCode from a pre-prepared 1 bit image and I have been using it with both laser and impact magnet work with some very good results.
This program is free to use and can be downloaded from here http://dotg.weebly.com/download.html
Hope this is of interest.
Tweakie.
Thanks! I’ll try it over the weekend. Cheers, David
Awesome build! Pretty much the first laser cutter/engraver I’ve ever seen without flying optics. I guess, it must be the smaller size of the RF-excited tube that makes it possible. So, what type of material / thickness can be actually cut (as opposed to engrave) using 18W of power? Can you cut balsa sheets? Also, I’m very interested in whether you had to focus the beam and if yes, then how, can you share?
Sorry, so many questions in my mind … so, is a sheet of transparent plexi enough of a filter for the IR beam (scattered as in may be in the reflections)? Thanks!
Hi Nick,
Thank you for your kind comments. Regarding your questions:
I regularly cut balsa and up to 1/4″ plexy
The beam is focused using a 1″ FL ZnS lens
Transparent plexy is sufficient to filter the relatively long-wavelength IR beam from a CO2 laser
Thanks, David! Wow, 1/4″ plexi (acrylic) with 18W of IR! (what wavelength is that, BTW?) Epilog does not even call their 30W laser a cutter/engraver – it’s very much only engraver by their own admission. I think the only machine that earns the “cutter” designation by them is their 60W. Is there something particular about the output of this tube that makes it more capable perhaps? You’ve got me very intrigued here.
I was looking at the Chinese machines that come with 60 and 90W tubes but they are very bulky, so I’m mulling over the idea of building my own. I’m fine on the CNC and motion control part but the actual inner workings of the laser beam source is still a mystery to me, so I will appreciate any comment you may have on the cutting ability of your particular implementation since it does look more compact and rather easier to make than those with larger tubes.
Does the color of the plexi play any part, by the way? Do you happen to remember the feed rates you’ve used?
Thanks!
With plexy, cutting is not done on a single pass. It takes multiple slow passes to cut through all the way, but it does so very neatly. Color of the plexy doesn’t make any difference to cutting rates that I can tell.
Regarding the Chinese machines, I have a 40 W unit in my office from Full Spectrum Laser. I like it very much, especially its Retina Engrave software that allows CorelDraw to treat the laser engraver as a printer. It cuts acrylic just as my diy machine. By chance I have a reference 3/8″ piece in front of me that I cut with 15 passes at 50% FR and 20 mA to the tube on the FSL machine.
Cheers,
David
I’m planning this exact mod to a taig mill but I am going to use a 60 watt Chinese CO2 tube. Was considering to mount it vertically directly to the mill spindle but offset to the right side. Yes, it will be tall but should work fine. I followed the retrofit that tweakie did, very informative. Maybe I’ll document my build also. It is pretty interesting how you did the offset mounted laser. Only way I could do that would be to build a frame to mount the taig on, not out of the question at all. I could also mount the laser horizontally behind the taig and use a mirror system. I’ll have to think this over.